Setting Up Brother MFC-L2700DW with Windows Computer: A Comprehensive Guide
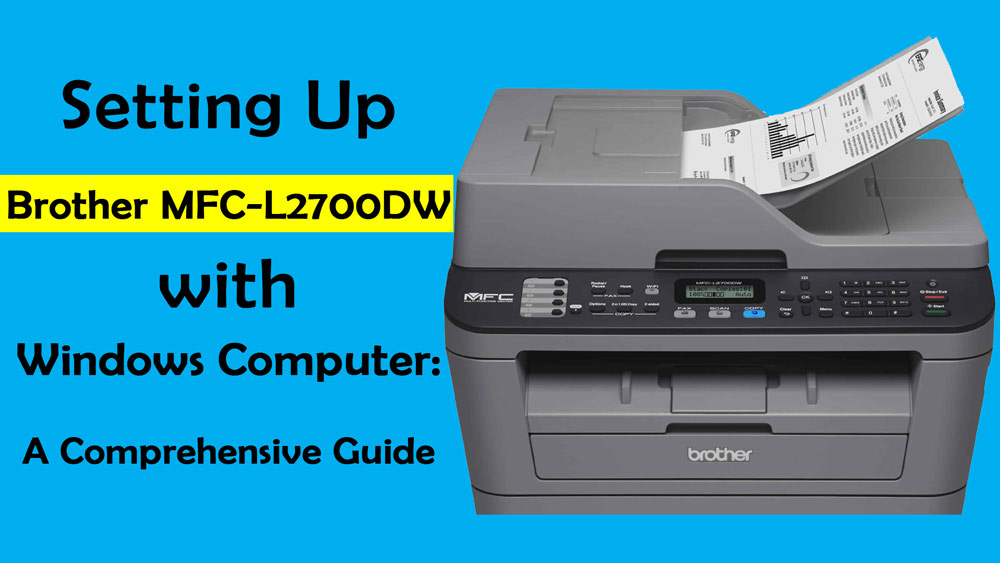
The Brother MFC-L2700DW is a versatile all-in-one monochrome laser printer designed for both home and office use. It offers printing, scanning, copying, and faxing capabilities with a compact footprint and robust performance. Setting up this printer with a Windows computer can seem daunting, but with this step-by-step guide, you’ll have it up and running in no time.
Why Choose Brother MFC-L2700DW?
Before diving into the setup process, let’s take a moment to appreciate the features that make the Brother MFC-L2700DW a popular choice:
1. Wireless and Wired Connectivity: Connect via Wi-Fi, Ethernet, or USB.
2. Fast Printing Speed: Up to 27 pages per minute.
3. Automatic Duplex Printing: Save paper with double-sided printing.
4. High-Quality Output: Crisp text and professional graphics.
5. Multi-Functionality: Print, scan, copy, and fax all in one device.
Now, let’s move on to the setup process.
Step 1: Unboxing and Initial Setup
1. Unbox the Printer: Carefully remove the printer from its packaging. Make sure you have all the components, including the power cord, installation CD, user manual, and starter toner cartridge.
2. Remove Protective Materials: Remove all protective tapes and materials from the printer.
3. Install the Toner Cartridge:
o Open the front cover.
o Unpack the toner cartridge.
o Gently shake the cartridge to distribute the toner evenly.
o Insert the cartridge into the drum unit until it clicks into place.
o Close the front cover.
4. Load Paper:
o Pull out the paper tray.
o Adjust the paper guides to fit the size of your paper.
o Load the paper into the tray and adjust the guides to secure it.
o Reinsert the paper tray into the printer.
5. Connect the Power:
o Plug the power cord into the printer and an electrical outlet.
o Press the power button to turn on the printer.
Step 2: Install Printer Drivers and Software
Option A: Using the Installation CD
1. Insert the CD: Place the installation CD into your computer’s CD/DVD drive.
2. Run the Setup Program: Follow the on-screen instructions to begin the installation process.
3. Connect the Printer: When prompted, connect the printer to your computer using a USB cable.
4. Complete Installation: Follow the remaining prompts to complete the installation. The setup wizard will guide you through connecting the printer to your Wi-Fi network if desired.
Option B: Downloading Drivers from the Brother Website
If your computer doesn’t have a CD/DVD drive, you can download the necessary drivers and software from the Brother website.
1. Visit the Brother Support Website: Go to Brother Support.
2. Select Your Printer Model: Enter “MFC-L2700DW” in the search bar and select your printer model from the list.
3. Download the Drivers: Choose the appropriate drivers for your Windows version and download the setup file.
4. Run the Setup Program: Open the downloaded file and follow the on-screen instructions.
5. Connect the Printer: When prompted, connect the printer to your computer using a USB cable.
6. Complete Installation: Follow the remaining prompts to complete the installation, including connecting to Wi-Fi if desired.
Step 3: Connect to Wi-Fi Network
To enjoy the wireless capabilities of your Brother MFC-L2700DW, follow these steps to connect it to your Wi-Fi network:
1. Access Network Settings: Press the “Menu” button on the printer’s control panel.
2. Navigate to Network: Use the arrow keys to select “Network” and press “OK.”
3. Select WLAN: Choose “WLAN” and press “OK.”
4. Setup Wizard: Select “Setup Wizard” and press “OK.” The printer will search for available Wi-Fi networks.
5. Select Your Network: Choose your Wi-Fi network from the list and press “OK.”
6. Enter Wi-Fi Password: Use the arrow keys to enter your Wi-Fi password. Press “OK” to confirm each character.
7. Complete Connection: Press “OK” once more to complete the connection. The printer will display a confirmation message once it’s connected to the network.
Step 4: Configure Printer Settings on Windows
Once the printer is connected to your computer and network, you may need to adjust some settings to optimize its performance.
1. Open Devices and Printers: Go to the Control Panel on your Windows computer and select “Devices and Printers.”
2. Add a Printer: Click on “Add a printer” and follow the on-screen instructions. Windows should automatically detect your Brother MFC-L2700DW if it’s on the same network.
3. Set as Default Printer: Right-click on your printer’s icon and select “Set as default printer” to make it your primary printing device.
Printer Preferences: Right-click on the printer icon again and select “Printer properties” or “Printing preferences” to adjust settings like paper size, print quality, and duplex printing.
Step 5: Test the Printer
1. Print a Test Page: Go to “Devices and Printers,” right-click on your Brother MFC-L2700DW, and select “Printer properties.” Click on “Print Test Page” to ensure everything is working correctly.
2. Scan a Document: Open the Brother ControlCenter4 software installed on your computer. Select “Scan” and follow the prompts to scan a document.
3. Copy a Document: Place a document on the scanner glass, select “Copy” on the printer’s control panel, and follow the instructions.
Troubleshooting Tips
- Printer Not Detected: Ensure the printer is powered on and connected to the same network as your computer. Restart your router if necessary.
- Poor Print Quality: Check the toner cartridge and drum unit. Replace them if necessary. Use the “Printer properties” menu to adjust print settings.
- Connection Issues: Ensure your Wi-Fi network is stable. Reconnect the printer to the network if needed.
Conclusion
Setting up the Brother MFC-L2700DW with a Windows computer is a straightforward process that can be accomplished in a few steps. Whether you’re using a USB connection or Wi-Fi, this guide covers all the essential steps to get your printer up and running. Enjoy the convenience and efficiency of your new all-in-one printer, capable of handling all your printing, scanning, copying, and faxing needs with ease. If you encounter any issues, refer to the troubleshooting tips or consult the user manual for further assistance. Happy printing!


FEEL FREE TO DROP US A LINE.